How to Record on Oculus Quest 2: Ultimate Guide
Are you eager to capture your amazing virtual reality experiences on the Oculus Quest 2, but not sure where to start? You’re in the right place!
Recording your VR gameplay can be an exciting way to share your adventures with friends, create content for your audience, or simply relive your favorite moments. Imagine the thrill of watching your epic battles, creative builds, or immersive explorations again and again.
In this guide, you’ll discover the simple steps to record on your Oculus Quest 2, ensuring that you never miss a moment of the action. Whether you’re a seasoned VR enthusiast or a curious newcomer, you’ll find these tips easy to follow and incredibly rewarding. Let’s dive in and unlock the secrets to capturing your virtual reality world!
Setting Up Your Oculus Quest 2
Start by unboxing your Oculus Quest 2. Find a safe space. Hold the device carefully. Turn it on using the power button. Follow the on-screen steps. Adjust the headset for comfort. Ensure it fits well. Check if the lenses are clear.
Go to settings on the device. Click on Wi-Fi. Choose your network from the list. Enter the password. Wait for the connection to establish. Make sure the signal is strong. Weak signals can cause issues.
Check storage space in settings. Delete unnecessary apps. Free up space for new games. Keep at least 20% storage free. This helps in smooth operation. Avoid downloading too much at once.
Credit: www.roadtovr.com
Recording Basics
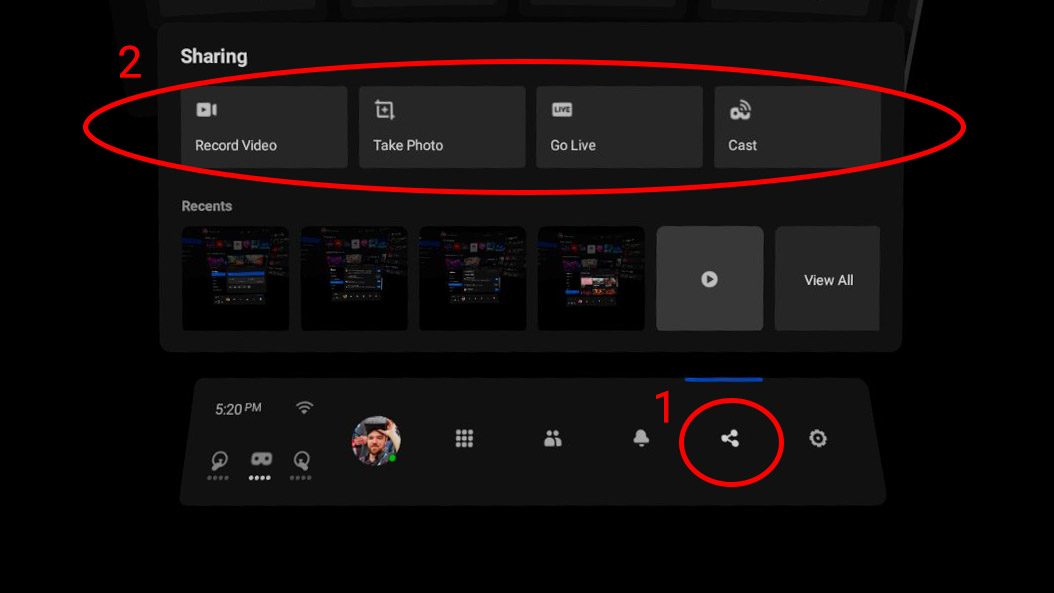
Recording on the Oculus Quest 2 is simple. First, put on your headset. Next, find the menu buttonon your controller. Press it to open the menu. Look for the share buttonin the menu. Choose record videofrom the options. Now, your Quest 2 will start recording.
Video quality is important. Lower quality saves space. Higher quality looks better. Choose what works for you. In settings, find video options. Adjust the resolutionto fit your needs. Remember, higher quality uses more battery. Adjust wisely.
Audio makes your video better. You can record with sound. Find the audio settings in the menu. Turn on the microphone. This records your voice. You can also use external mics. Just connect them to your headset. Test the sound before recording. Good audio makes a difference.
Recording Gameplay
Press the Oculus buttonon your controller to open the menu. Navigate to the Shareoption. Click on Record Videoto start. Ensure your game is running. The recording begins instantly.
Check your settingsfor video quality. Choose the highestoption available. Make sure your headset is fully charged. Good lighting helps in capturing better footage. Keep your movements steady for clarity.
Pause if you need to check notifications. This avoids interruptions. To stop recording, press the Oculus buttonagain. Select Stop Recording. The video saves automatically.
Recording With External Devices
Recording on Oculus Quest 2 with external devices enhances your virtual experience. Connect devices via USB or HDMI for seamless capturing. Adjust settings for optimal video quality and enjoy immersive playback.
Using A Capture Card
A capture cardcan help record Oculus Quest 2. Connect the capture card to the headset. It will grab the video feed. This device sends the feed to a computer. The computer saves the video. Make sure the capture card is compatiblewith Oculus Quest 2. Some cards need softwarefor recording. Install the required software. Follow the steps provided by the manufacturer.
Connecting To A Pc
Linking the Oculus Quest 2 to a PChelps record easily. Use a USB cable to connect. The PC recognizes the headset. Open a recording softwareon the PC. Start recording your gameplay. Ensure the PC has enough spacefor the video. Video files can be large. Check the connection regularly. A stable link ensures smooth recording.
Streaming And Recording Simultaneously
Streaming and recording at the same time is possible. Use streaming platformslike Twitch or YouTube. Connect the Oculus Quest 2 to your PC. Start the streamusing the platform’s tools. Record the stream on your PC. Make sure the internet connection is fastand stable. This helps avoid lags. Streaming platforms often have settings for recording. Adjust them for better quality.
Editing And Sharing Recordings
Recording on Oculus Quest 2 is simple and fun. Capture your gameplay by using the built-in record feature. Easily edit and share your recordings to showcase your virtual experiences with friends.
Transferring Files To Your Computer
First, connect your Oculus Quest 2 to the computer. Use a USB-C cable. The computer should detect your device. Open the file explorer on your computer. Look for the Quest 2 drive. Find the folder named “VideoShots.” Your recordings are here. Drag and drop files to your computer. This is how you transfer files easily.
Basic Editing Techniques
Once files are on your computer, start editing. Use free editing tools like iMovie or Windows Movie Maker. Trim unwanted parts from recordings. Add captions or text if needed. Adjust the volume to improve sound. Keep videos short and engaging. Always save your edited version. This makes sharing easier later.
Uploading To Social Media
Share edited videos with friends. Open the social media platform you prefer. Facebook, Instagram, or YouTube work well. Find the upload option on the platform. Select your edited video file. Add a short description or title. Choose privacy settings wisely. Hit the upload button. Let friends enjoy your creations.
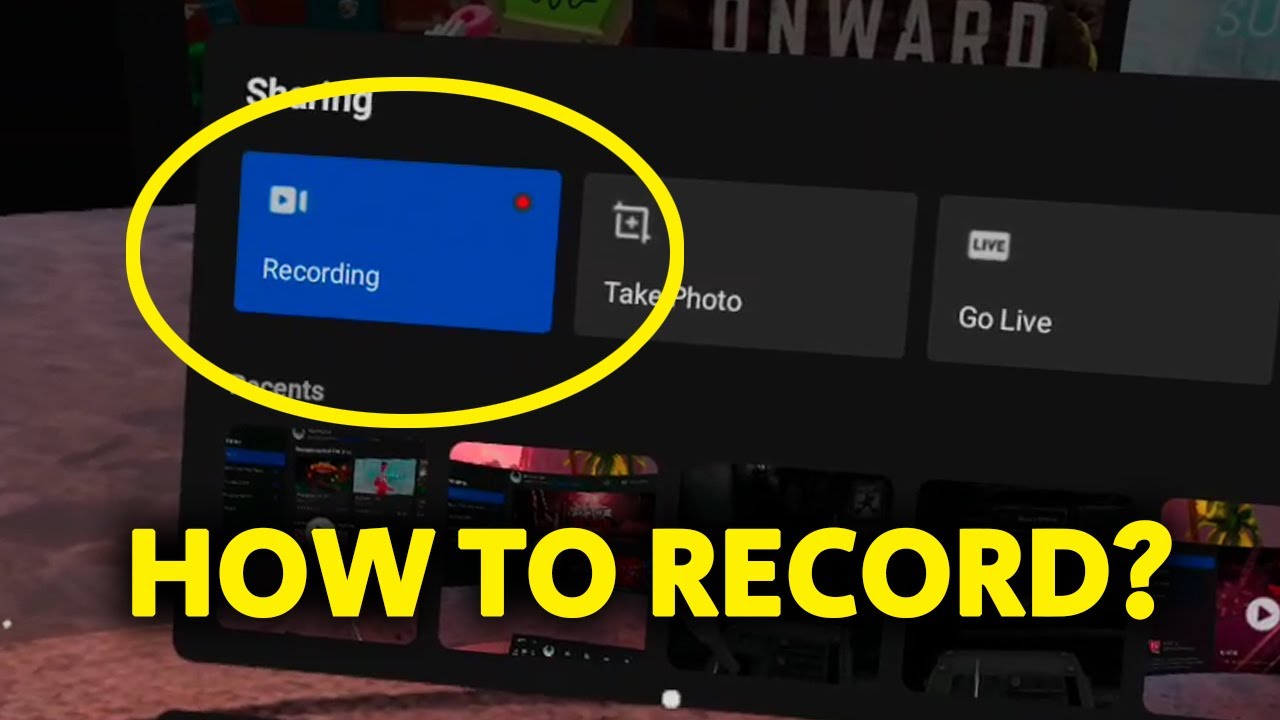
Credit: www.youtube.com
Troubleshooting Recording Issues
Recording on the Oculus Quest 2 can sometimes be tricky. Some users face issues with sound not being recorded. Check if the microphone is enabled. Screen lag is another common problem. Try lowering the graphics settings. Occasionally, recordings might not save. Ensure there is enough storage space. If the video quality is poor, adjust the video resolution settings.
To improve recording, make sure other apps are closed. This frees up system resources. Use a clean background to reduce distractions. A well-lit room helps in capturing clear videos. Adjust the headset properly for a stable view. Take breaks to avoid overheating. Keep the lenses clean for a clear view.
Always check for the latest software and firmware updates. Updates fix bugs and improve performance. Connect your Oculus Quest 2 to Wi-Fi regularly. This ensures you get the newest updates. Restart your device after updates for best results. Keeping the software updated often resolves many issues.
Tips For Better Recordings
Use strong Wi-Fi for better videos. Good lighting is key. Avoid dark rooms. Adjust settings for higher resolution. Keep the lens clean. A dirty lens makes blurry videos. Frame your shot nicely. Make sure everything important fits in the screen.
Quiet spaces help. Loud noises make bad audio. Use a good microphone if possible. Speak clearly and slowly. Don’t cover the mic. Keep it open. Check sound settings before starting. Adjust volume levels for clarity.
Close unused apps. They can slow things down. Restart the device before recording. It clears memory. Charge fully to avoid power issues. Record in short sessions. Long sessions can cause lags. Check updates regularly. Updated software runs better.

Credit: democreator.wondershare.com
Frequently Asked Questions
How To Start Recording On Oculus Quest 2?
To start recording on Oculus Quest 2, press the Oculus button on the right controller. Navigate to the “Sharing” menu and select “Record Video. ” Confirm to start recording your gameplay. This straightforward process lets you capture your VR experiences easily, enhancing your ability to share them with others.
Can You Record Audio On Oculus Quest 2?
Yes, you can record audio along with video on Oculus Quest 2. Ensure your microphone is enabled in settings. This feature allows you to capture your voice and in-game sounds, making your recordings more immersive and detailed for viewers.
How To Stop Recording On Oculus Quest 2?
To stop recording, access the “Sharing” menu again and select “Stop Recording. ” Your video will be saved automatically. This ensures your gameplay recording is safely stored, allowing you to review or share your VR experience anytime.
Where Are Recordings Saved On Oculus Quest 2?
Recordings are saved in the “Files” app under “Video Captures. ” You can access them directly from your headset. This convenient storage method makes it easy to manage and view your captured content without additional devices.
Conclusion
Recording on Oculus Quest 2 is simple and fun. Start by accessing the menu. Tap the ‘Record’ button to begin. Capture your gaming moments with ease. Remember to save your videos after recording. Share them with friends or enjoy them later.
Whether playing solo or with others, recording enhances your experience. It helps relive exciting adventures. Keep practicing to perfect your recordings. Explore different games and record unique experiences. With these tips, you’re ready to record on Oculus Quest 2. Enjoy your virtual world and create lasting memories!

Finnian Delaney is a seasoned writer and editor specializing in technology and electronics. At ElectroDoz, he covers a wide range of topics, with a focus on MacBooks, laptops, fitness trackers, keyboards, and computer hardware. With a knack for making complex tech accessible, Finnian helps readers stay informed and confident when choosing their next device or upgrade.