How to Add Printer to Macbook Air: Quick & Easy Guide
Imagine you’re in the middle of an important project, and you need to print a document quickly. Your MacBook Air is ready, but there’s just one problem—you haven’t set up your printer yet.
Frustration sets in as you scramble to figure out how to connect your devices. Don’t let this scenario stress you out. Adding a printer to your MacBook Air is simpler than you might think, and with the right guidance, you can have it done in minutes.
You’ll discover a straightforward, step-by-step process to ensure you’re never caught off guard again. Whether you’re tech-savvy or a beginner, this guide is designed just for you. Keep reading to make printing from your MacBook Air a breeze.
Credit: itss.d.umn.edu
Check Printer Compatibility
Make sure your printer works with Macbook Air. Look for compatibility on the printer box or manual. Check if your printer supports wireless connection. Most modern printers do. Older printers may need a USB connection. Visit the printer’s website for more information. Find drivers if needed. Download drivers for Macbook Air. This helps your printer work properly. Some printers need special software. Download and install it. Macbook Air works best with certain printers. Choose a printer that is easy to set up. Check reviews online. See what others say about the printer. Compatibility is key for smooth printing.
Credit: www.youtube.com
Connect Printer To Macbook Air
Plug the USB cable into your printer. Connect the other end to your Macbook Air. Your Macbook will show a notification. Click on it to install the printer. Follow the on-screen steps. Make sure your printer is turned on. Check if the printer is ready. You can now print documents.
Turn on your printer’s Wi-Fi. Go to your Macbook and open System Preferences. Select “Printers & Scanners”. Click on the plus sign to add a printer. Find your printer in the list. Click to connect. Enter the Wi-Fi password if asked. Your printer is now connected. Print a test page to check.
Install Printer Drivers
Visit the printer brand’s website. Find the support or downloads section. Enter your printer model number. Locate the correct driver for your printer. Click to download the driver. Open the downloaded file and follow the instructions. This will install the driver on your Macbook Air. Make sure your printer is connected to your Macbook Air. Use a USB cable or Wi-Fi. After installing, your printer should work well.
Open System Preferences on your Macbook Air. Click on Printers & Scanners. Press the plus (+) button to add a printer. Your Mac will search for available printers. Select your printer from the list. MacOS will install the driver for you. This process is often automatic. If you see a message about software, install it. Now, your printer is ready to use.
Credit: mackeeper.com
Add Printer Via System Preferences
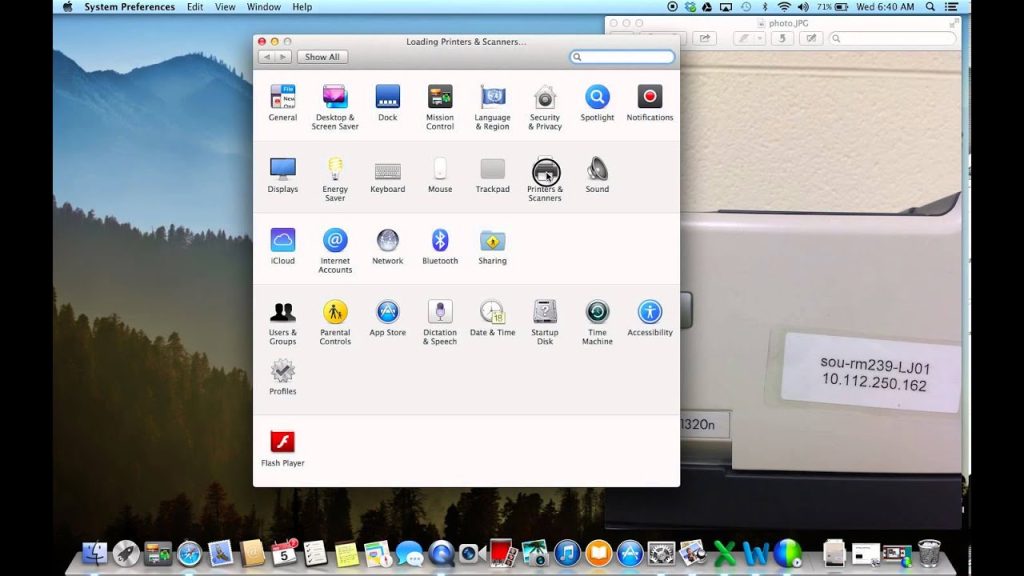
Open your Macbook Air. Click the Apple logo at the top left. Select System Preferences. Look for the icon with gears. That’s it!
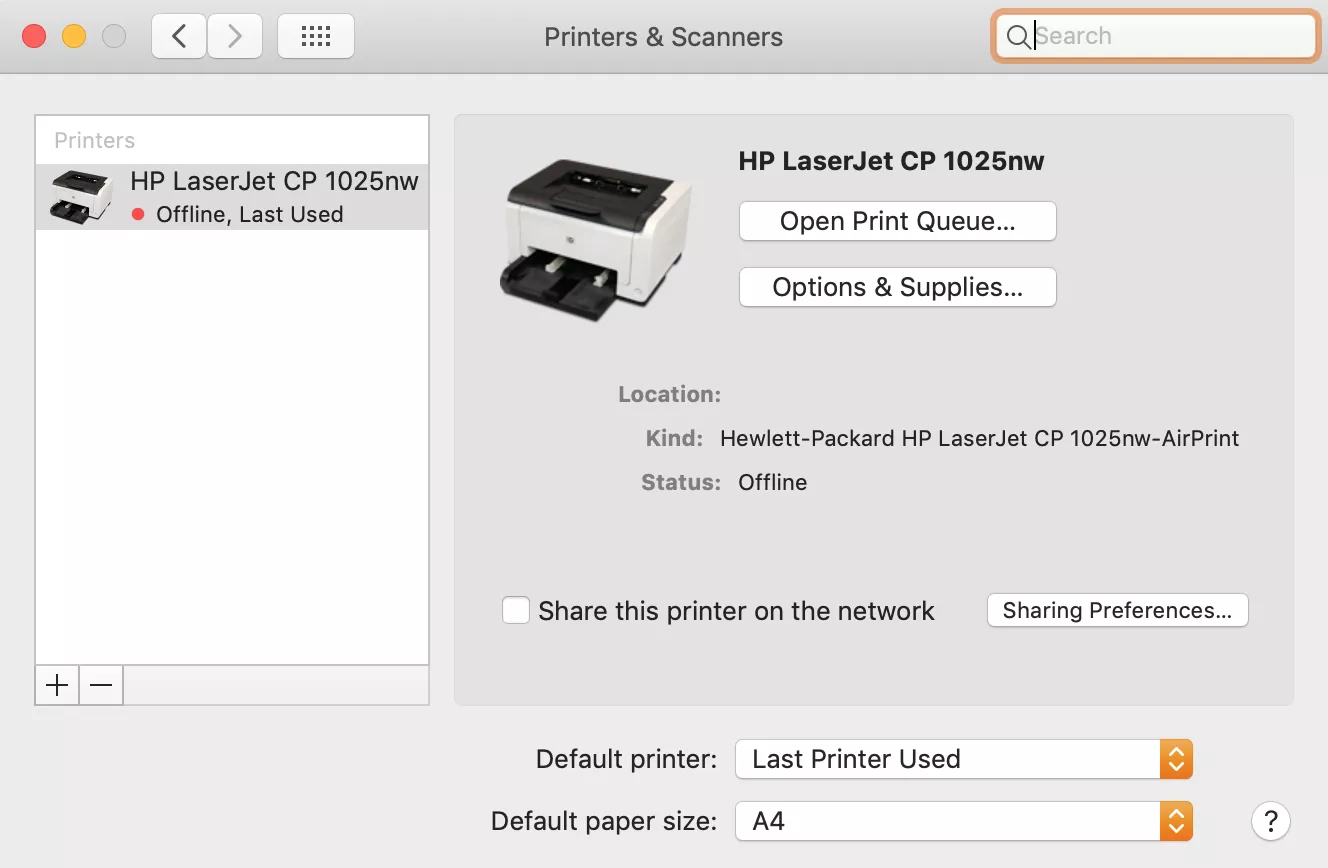
In the System Preferences menu, find Printers & Scanners. Click on it. A new window will open. This shows all available printers.
Press the plus (+) button at the bottom left. Wait for your printer to appear. Click on your printer name. Then, press Add. Your printer is now ready to use.
Troubleshoot Common Issues
Many users face connection problemswith printers. Check if the printer is turned on. Ensure the printer is connected to Wi-Fi. Restart your Macbook Airand printer. Try using a USB cablefor connection. Verify the printer is compatiblewith your Macbook Air. If issues persist, consult the user manual.
Printer software needs regular updates. Check for updates on your Macbook Air. Go to System Preferences. Select Software Update. Install any available updates. Updated software can fix bugsand improve performance. Ensure the printer driver is up-to-date. Manufacturers often release new driver versions. Visit the printer’s website for latest drivers.
Test Printer Functionality
To make sure the printer works, print a test page. Go to the printer settings on your Macbook Air. Select the option to print a test page. This helps you see if the printer is connected correctly. If the page prints well, the printer is ready.
Print A Test Page
Printing a test page is easy. First, open the settings menu on your Mac. Find your printer in the list. Click on it. Look for the option that says “Print Test Page”. Click it. Your printer will print a simple page. If the page is clear, the printer works well.
Check Printer Settings
Checking printer settings is important. Open the settings on your Macbook Air. Find the printer you added. Look at the settings closely. Ensure everything looks right. Make sure the printer is set as default. Check if the paper size is correct. Verify the ink or toner levels. Adjust settings if needed.
Frequently Asked Questions
How Do I Connect My Printer To Macbook Air?
To connect a printer to your Macbook Air, go to ‘System Preferences’, then ‘Printers & Scanners’. Click the ‘+’ button to add your printer. Ensure your printer is turned on and connected to the same network. Follow the on-screen instructions to complete the setup.
Why Won’t My Macbook Air Find My Printer?
If your Macbook Air can’t find your printer, check the network connection. Ensure both devices are on the same Wi-Fi network. Restart your printer and Macbook Air. Also, make sure your printer’s drivers are updated. If issues persist, consult your printer’s manual or support.
Can I Add A Wireless Printer To Macbook Air?
Yes, you can add a wireless printer to your Macbook Air. Ensure your printer supports Wi-Fi connectivity. Connect both devices to the same network. In ‘System Preferences’, choose ‘Printers & Scanners’ and add your printer. Follow the setup instructions provided on-screen.
How To Troubleshoot Printer Issues On Macbook Air?
To troubleshoot printer issues, ensure your printer is properly connected and powered. Check for any error messages on the printer display. Restart both devices and update printer drivers if necessary. If problems continue, consult Apple’s support or your printer manufacturer’s help resources.
Conclusion
Connecting a printer to your Macbook Air is simple. Follow the steps outlined, and you’ll print in no time. Start by selecting your printer model and connecting it to your Wi-Fi. Ensure your Macbook Air is updated to avoid any issues.
Use the ‘System Preferences’ and ‘Printers & Scanners’ options to add your device. Double-check your printer’s status to confirm successful setup. Troubleshooting tips can help if you face problems. With these guidelines, printing tasks become seamless. Enjoy the convenience of wireless printing with your Macbook Air.

Finnian Delaney is a seasoned writer and editor specializing in technology and electronics. At ElectroDoz, he covers a wide range of topics, with a focus on MacBooks, laptops, fitness trackers, keyboards, and computer hardware. With a knack for making complex tech accessible, Finnian helps readers stay informed and confident when choosing their next device or upgrade.