How to Connect Security Camera to Wifi: Easy Guide
Imagine having the power to monitor your home or office from anywhere in the world. That’s what connecting your security camera to WiFi can do for you.
Whether you’re at work, on vacation, or just lounging in your living room, knowing you can check in at any time gives you peace of mind and control. But the thought of setting up a security camera can be daunting, right?
Don’t worry—it’s simpler than you think. This guide is crafted to walk you through each step, ensuring you make the most of your security system. Ready to unlock a new level of security and convenience? Let’s dive in and get your camera connected to WiFi effortlessly.

Choosing The Right Security Camera
Security cameras come in many types. Dome cameras are round and often used indoors. Bullet cameras are long and good for outdoor use. PTZ cameras can move and zoom to see more areas. Each type has its own use. Picking the right type is important for safety.
Think about the camera’s resolution. Higher resolution means clearer pictures. Night vision is useful for dark areas. Motion detection can send alerts when something moves. Two-way audio lets you talk through the camera. Weatherproof cameras can handle rain and sun. Storage options like cloud or SD card are also key. Look at all features before buying.
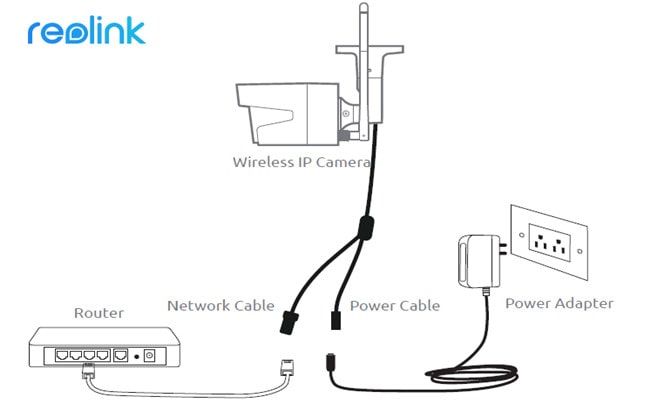
Credit: www.youtube.com
Preparing For Connection
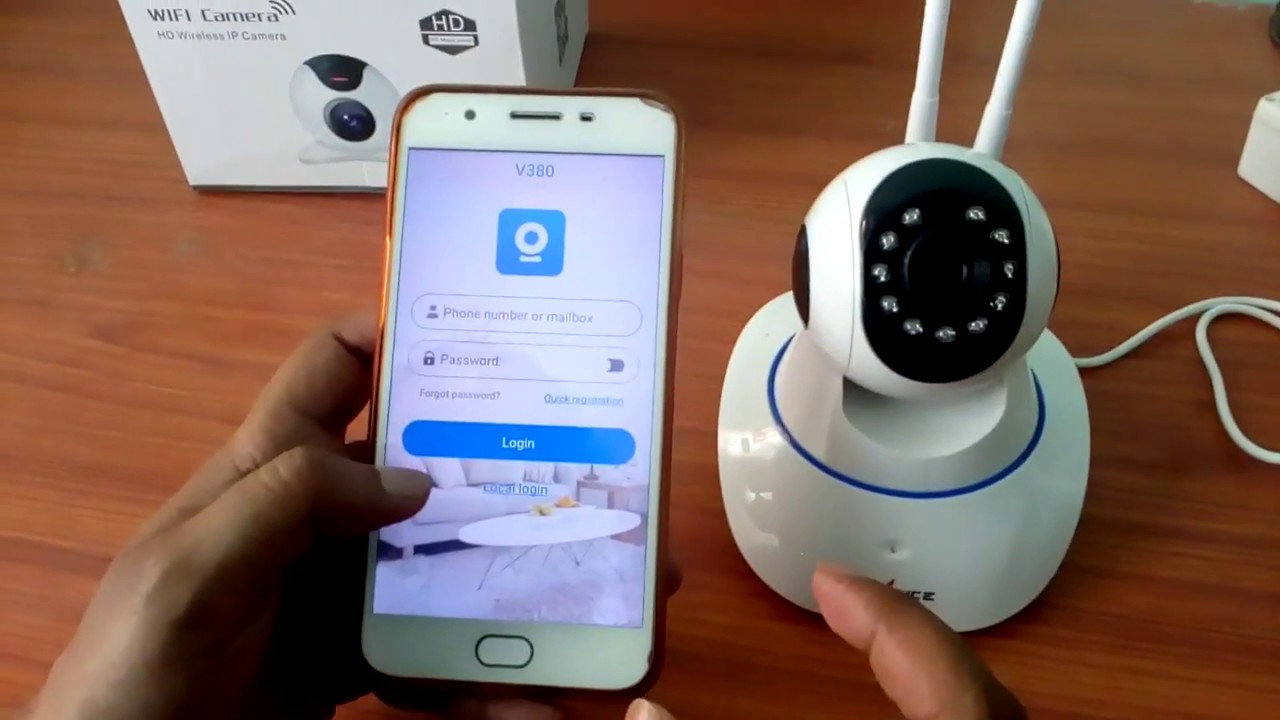
Begin by collecting all the needed items. You will need a security camera and a power source. A smartphone or computer is also required. Make sure you have the wifi network name and password handy. Check if you have a stable internet connection. Gather these items to ensure a smooth setup process. It helps to have the camera’s manual nearby too. This will guide you through any specific steps.
Verify the camera supports your wifi network. Most cameras work with 2.4 GHz networks. Some may also support 5 GHz networks. Check the camera specifications to confirm. Ensure your router is compatible too. This means checking if it supports the required frequency. Sometimes, adjusting router settings is necessary. Ensuring compatibility avoids connection issues later.
Setting Up Your Security Camera
Choose a good spot for your camera. It should cover important areas. Walls and ceilings are good places. Make sure the camera is secure. You don’t want it to fall. Use screws or strong tape for safety. If you have a manual, follow the steps. This helps you do it right.
Find the power cable in the box. Connect it to the camera. Then, plug it into a power outlet. Wait for the light to turn on. This means the camera is getting power. If it doesn’t work, check all connections. Make sure everything is plugged in well.
Credit: videos.cctvcamerapros.com
Connecting To Wifi
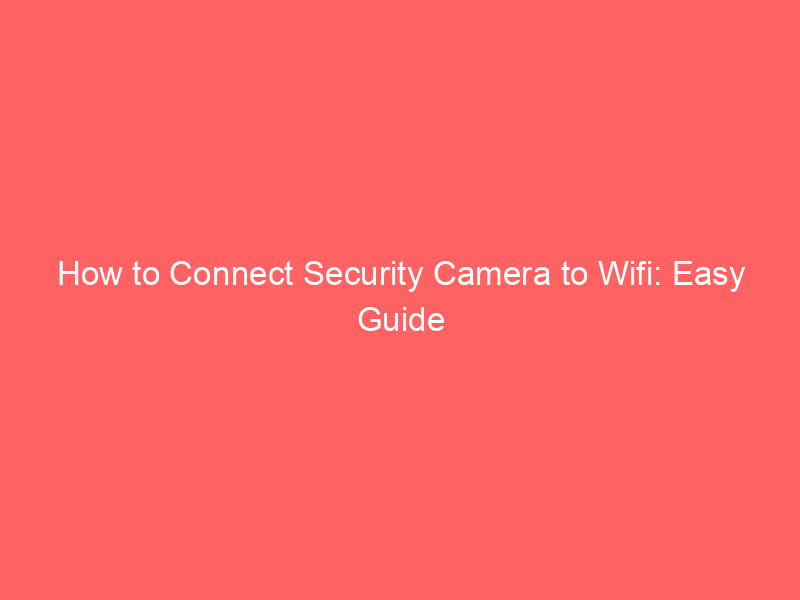
Setting up your security camera to connect to WiFi is simple. Begin by accessing the camera’s settings menu, then select the WiFi option. Enter your network name and password to establish a secure connection.
Accessing The Camera’s Settings
First, find the settings menuon your security camera. This menu might be on the camera’s app or a built-in screen. Look for a button or option labeled “Settings”. Once in, navigate to the network settings. This is where you will find the Wifi options. Make sure your camera is powered on and nearby.
Entering Wifi Credentials
In the network section, you will see a list of available Wifi networks. Choose your home Wifi network from the list. Enter the Wifi passwordcarefully. Double-check the password to avoid mistakes. After entering, select “Connect”. Wait for the camera to link to the Wifi. Once connected, you should see a confirmation message.
Testing Your Connection
Confirm the camera’s live feedis working. Open the app on your phone. Look for the real-time video. Check if the picture is clear. Ensure there is no lag. This means your connection is strong.
Verifying Live Feed
Use your computer or tablet. Open the camera’s website. Log in with your account. Find the live view option. Click to see the feed. Check if the video matches the app. Both should show the same live scene.
Troubleshooting Connection Issues
- Check your WiFi signal. Make sure it is strong.
- Restart the router if needed.
- Ensure the camera is close to the router.
- Update the camera’s software.
- Reset the camera and try again.
Credit: reolink.com
Enhancing Security Features
Keeping your security camera’s firmware updated is very important. It helps fix bugs and improve features. Check the camera’s settings to find the update option. Connect the camera to WiFi for easy updates. Sometimes, updates add new security tools. This makes your home even safer. Follow the instructions carefully to update the firmware.
Alerts can tell you if something is wrong. They help you know if someone is near your home. Setting them up is easy. Go to the camera’s app and find the alerts section. Turn on notifications to get instant messages. Choose how you want to be notified. This could be through email or phone messages. Alerts help you stay informed all the time.
Frequently Asked Questions
How Do I Connect My Security Camera To Wifi?
To connect your security camera to WiFi, first ensure the camera is powered on. Access the camera’s settings via its app or web interface. Select the WiFi network and enter the password. Follow the prompts to complete the connection. Ensure your WiFi signal is strong for optimal performance.
Why Is My Camera Not Connecting To Wifi?
Your camera may not connect to WiFi due to weak signal, incorrect password, or network interference. Ensure your WiFi network is within range and the password is correct. Restart your router and camera. If issues persist, check the manufacturer’s troubleshooting guide or contact their support.
Can All Security Cameras Connect To Wifi?
Not all security cameras are WiFi compatible. Some require Ethernet or other connections. Check your camera’s specifications to ensure it supports WiFi. If your camera is not WiFi-enabled, consider using a wireless adapter or upgrading to a WiFi-compatible model for easier connectivity.
Is It Safe To Connect Cameras To Wifi?
Connecting cameras to WiFi is generally safe if you follow security best practices. Use strong, unique passwords and enable encryption. Regularly update the camera’s firmware. Consider setting up a separate network for your security devices. These steps help protect against unauthorized access and potential security threats.
Conclusion
Connecting your security camera to WiFi enhances home safety. It’s simple with the right steps. Follow instructions carefully for a stable connection. Ensure your network is secure to protect data. Troubleshooting common issues helps avoid frustration. Regular updates keep your camera running smoothly.
A connected camera offers peace of mind. You’re now equipped to manage your camera confidently. Enjoy the extra security and convenience it brings. Feel more secure knowing you can monitor your home remotely. Whether at work or on vacation, stay connected with ease.
Your efforts improve home safety and security.

Jaxon Wilder is a tech enthusiast and contributor at ElectroDoz, where he dives into the latest trends in electronics and smart gadgets. With a sharp eye for innovation and hands-on testing, Jaxon brings readers practical reviews, tips, and insights on everything from everyday tech accessories to advanced devices. His goal is to make technology simpler, smarter, and more enjoyable for everyone.