
How to Delete Imessages on Macbook: Step-by-Step Guide
Have you ever found yourself scrolling through your iMessages on your MacBook, only to discover a clutter of old messages that you no longer need? It can be overwhelming and perhaps even a bit frustrating.
But here’s the good news: deleting iMessages on your MacBook is easier than you might think. Imagine the satisfaction of a cleaner, more organized messaging app where you can effortlessly find the conversations that matter most. In this guide, we’ll walk you through the simple steps to clear out the clutter, helping you regain control over your digital space.
Stay with us, and let’s transform your messaging experience together.
Accessing The Messages App
Open your MacBook. Find the Messages appon the Dock. Click to open it. You can also find it using Spotlight Search. Press Command and Space. Type “Messages” in the search box. Press Enter. The app will open quickly.
Inside the app, see your conversation list. You will see all your chats. Select a chat you want to open. Click on it once. The messages appear on the right side.
Deleting messages is easy. Click the message you want to delete. Press the Delete keyon your keyboard. Confirm the deletion. The message will disappear.
Credit: mackeeper.com
Locating Conversations
It’s easy to find chats on your Macbook. Open the Messages app. You’ll see a list of conversations on the left side. Click any chat to view messages. Chats are listed by the last message. Older chats are lower in the list.
Use the Search function to find a chat. Click the search bar at the top. Type a name or word from the chat. Results appear below the search bar. Click on the chat you want. It’s a quick way to find messages.
Deleting Individual Messages
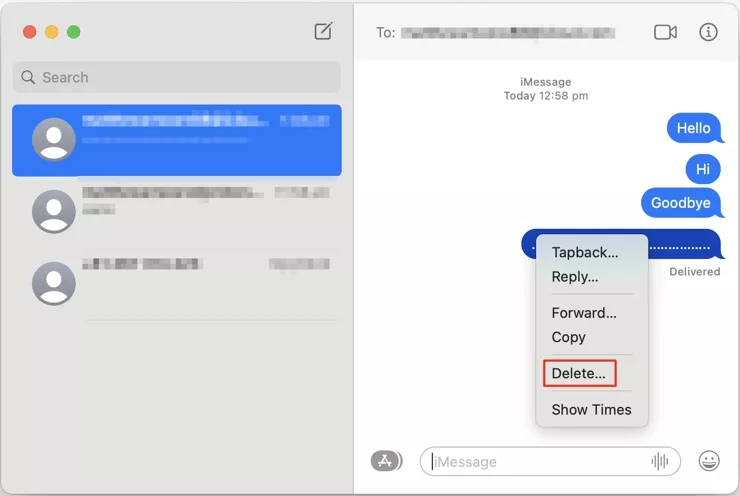
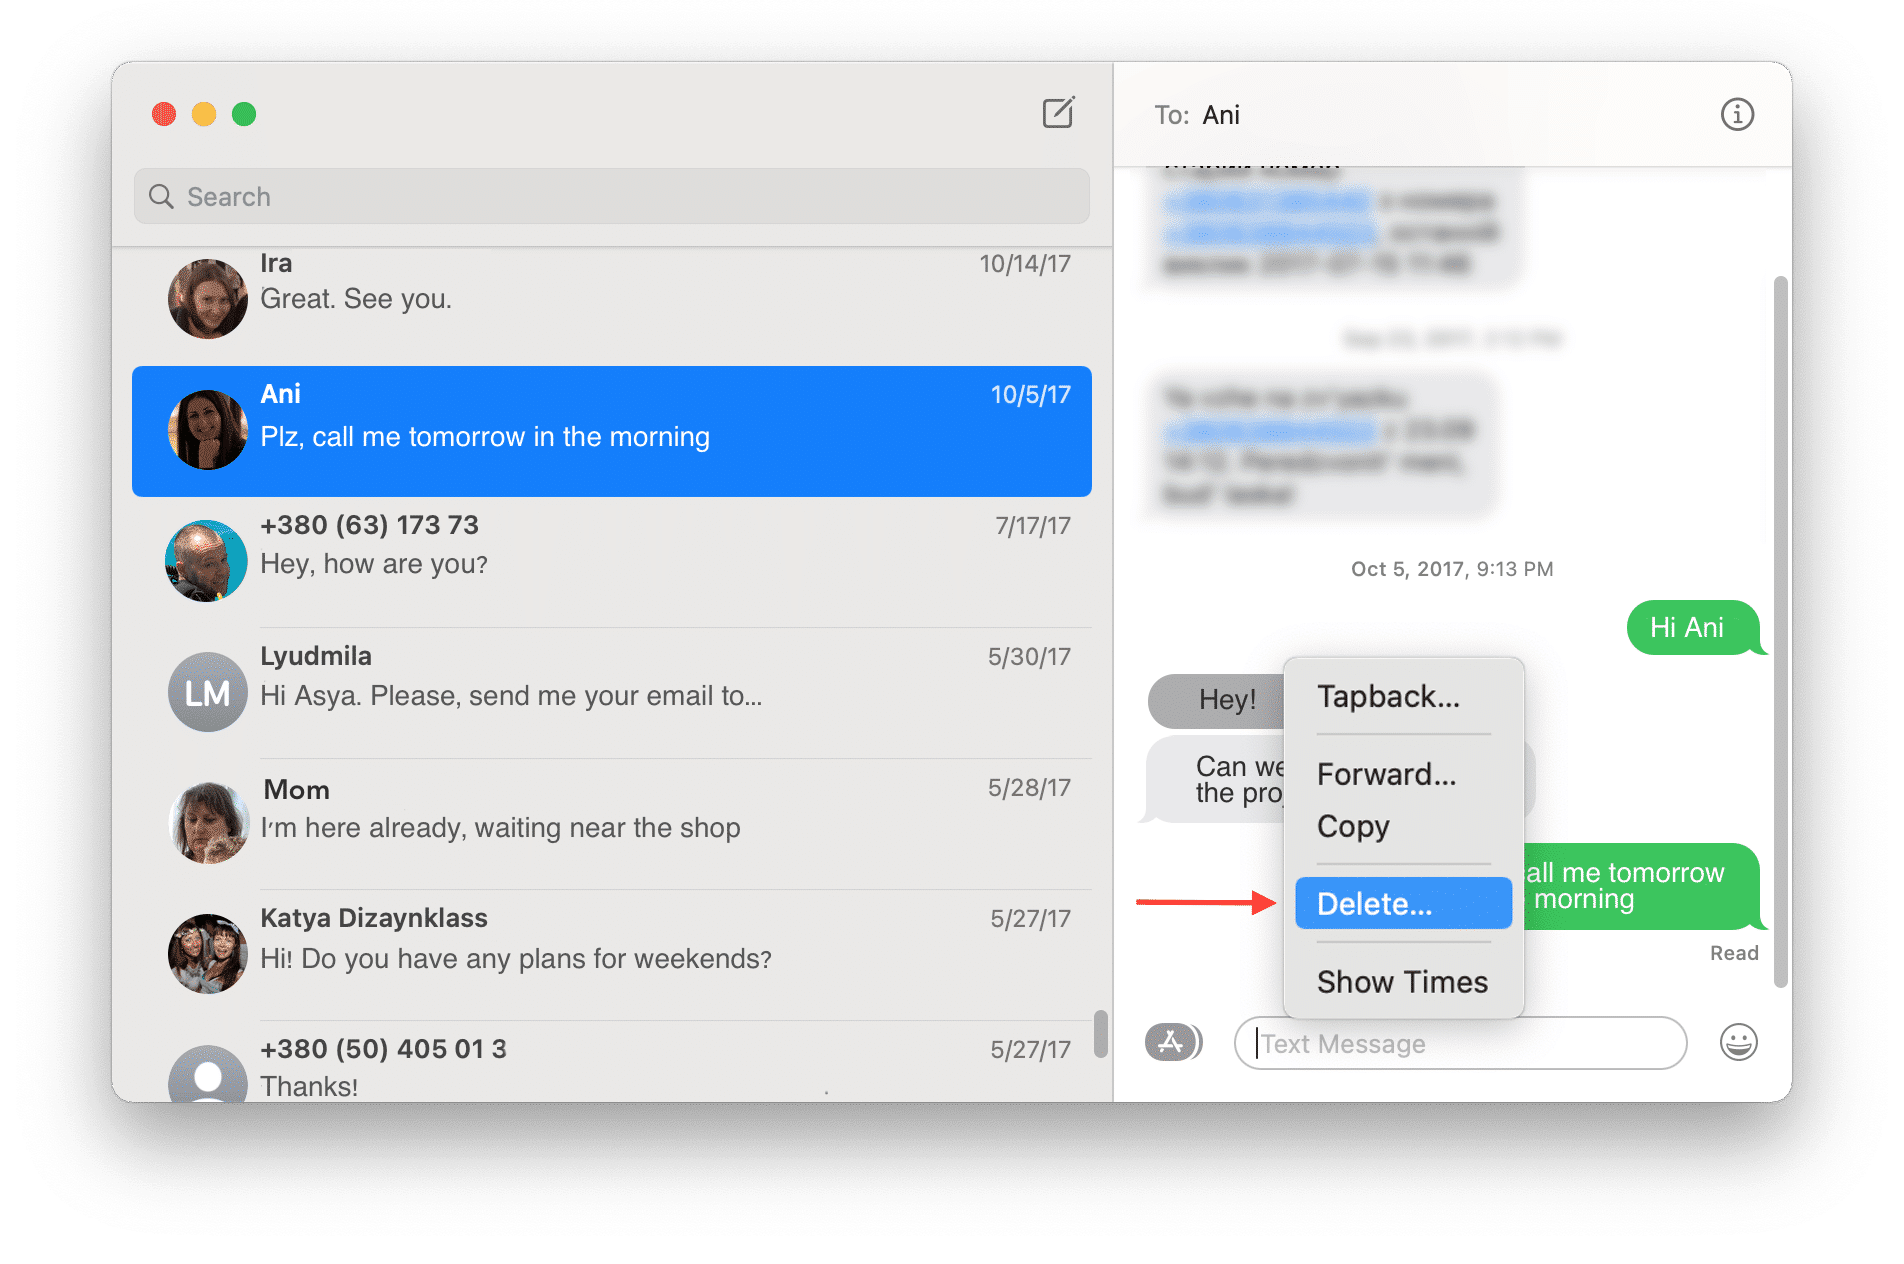
Open the Messages app on your Macbook. Find the conversation with the message you want to delete. Click on the conversation to open it. Locate the specific message. Click once on the message to select it. The message will be highlighted.
Press the Control keyon your keyboard. While holding it, click the selected message. A menu will appear. Choose the option that says Delete. A pop-up will ask if you’re sure. Click Deleteagain to confirm. The message will be gone.
Credit: nektony.com
Removing Entire Conversations
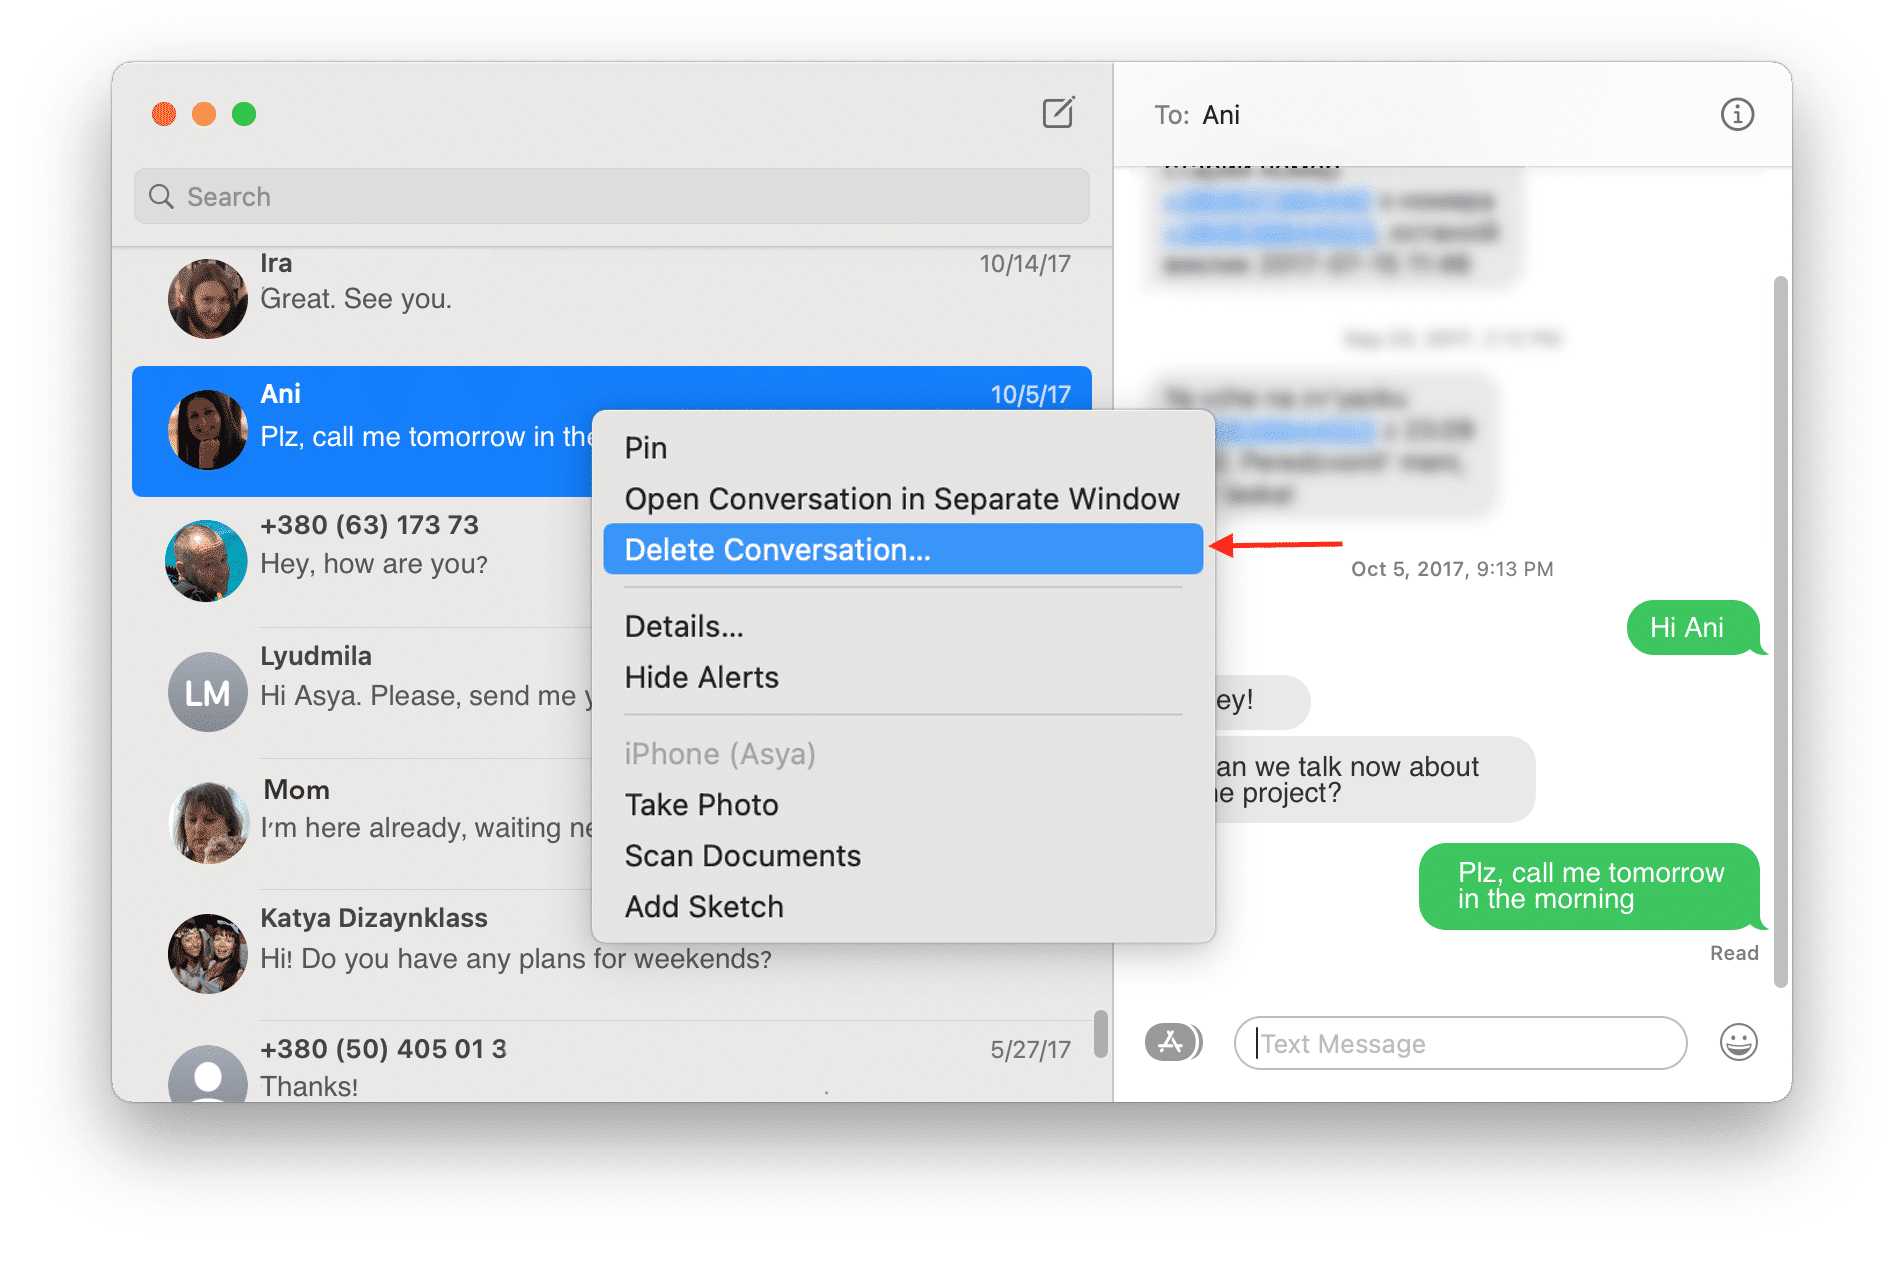
To delete iMessages on a MacBook, start by selecting conversations. Open the Messages app. Look at the left side. You will see a list of conversations. Click on the conversation you want to delete. Hold the Control keyon your keyboard. Then, click the conversation again. A menu will pop up. Choose the option that says “Delete Conversation”. A confirmation message will appear. Click “Delete” to confirm.
Selecting Conversations
It’s important to know how to choose the right conversation. Make sure you are selecting the correct one. Double-check before deleting. This prevents mistakes. Be careful to avoid deleting the wrong chat. You can’t get it back once it’s gone.
Permanent Deletion
Deleting conversations is a permanent action. Once you delete, it’s gone forever. Think twice before you delete. Ensure you no longer need the chat. This action can’t be undone.
Managing Storage And Privacy
iMessages can take up a lot of space on your MacBook. Clearing the cache helps free up storage. Go to the Messages app. Click on “Preferences”. Then, select the “Accounts” tab. From there, choose “Sign Out”. This will clear stored data. You can then sign back in. This action helps manage storage better.
Protecting your personal information is important. Delete old iMessages to keep data safe. Open the Messages app. Right-click on a message thread. Choose “Delete Conversation” from the menu. Confirm to delete. This keeps your information private and secure. Always check twice before deleting. You don’t want to lose important messages.
Credit: nektony.com
Troubleshooting Common Issues
Sometimes iMessages show error messageson your MacBook. These errors can confuse users. Restart your MacBook first. Then check your internet connection. Ensure it is stable. If errors persist, update your software. This might resolve issues. Still having errors? Consider reinstalling the iMessage app. Remember to back up your messages. This keeps important data safe.
iMessages may not sync well between devices. This can be frustrating. First, check your iCloud settings. Ensure they are correct. Next, turn off iMessage on your MacBook. Then turn it back on. This might fix sync issues. Still not syncing? Log out of iCloud and log back in. This often helps. Make sure all devices are on the same network. This ensures smooth syncing.
Frequently Asked Questions
How Do I Delete Imessages On Mac?
To delete iMessages on a Mac, open the Messages app. Find the conversation or message you want to remove. Right-click the message and select “Delete. ” Confirm your choice. This will permanently remove the message from your Mac.
Can I Delete Multiple Messages At Once?
Yes, you can delete multiple messages at once. Open the conversation, hold the Command key, and click each message. Right-click and select “Delete. ” Confirm the deletion to remove selected messages.
Will Deleting Imessages Affect My Iphone?
Deleting iMessages on your Mac won’t affect your iPhone or other devices. Messages are device-specific, and changes don’t sync across all devices. You’ll need to delete messages separately on each device.
How To Recover Deleted Imessages On Mac?
Recovering deleted iMessages on Mac is challenging. There’s no built-in recovery option in Messages. You might try restoring from a Time Machine backup, if available. Regular backups can help prevent permanent message loss.
Conclusion
Deleting iMessages on a MacBook is easy and quick. Follow the steps carefully. You can keep your device clutter-free. Remember, organizing your messages saves time. No more scrolling through endless chats. It’s all about simplicity. A clean inbox helps you focus better.
Enjoy a smoother messaging experience. Now, you’re ready to manage your messages. Keep your MacBook running efficiently. It’s all about staying organized. Your digital life deserves clarity. Happy tidying up your iMessages.

Finnian Delaney is a seasoned writer and editor specializing in technology and electronics. At ElectroDoz, he covers a wide range of topics, with a focus on MacBooks, laptops, fitness trackers, keyboards, and computer hardware. With a knack for making complex tech accessible, Finnian helps readers stay informed and confident when choosing their next device or upgrade.


